|
STEEP DOWN CONSTRUCTION SEQUENCE
BY ALLAN BROWN
I have shown a step by step construction sequence for this formation, just to
highlight how it was probably constructed.
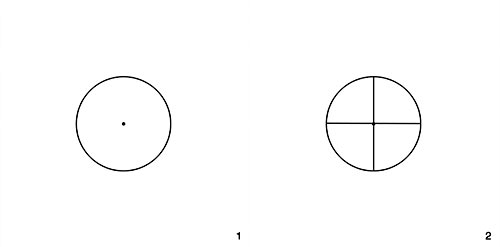
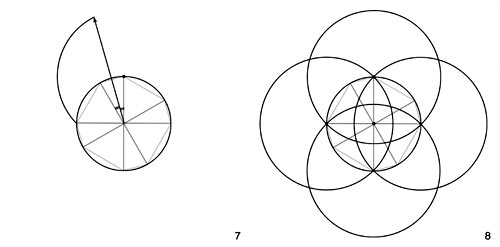
1/ Create the large central circle.
2/ Construct the vertical and horizontal axes.
3/CONSTRUCTION SEQUENCE 2
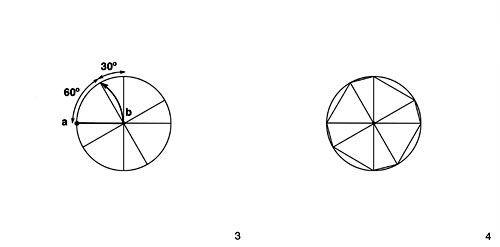
3/ Utilising the same radius that was used to construct the large central
circle, swing an arc so that anchorman 'a' is stationary at one of the four
axis points, and planker 'b' walks from the centre until he reaches the
circumference of the original large circle. This automatically creates a 30ş
angle in relation to the adjacent axis point.
4/ The other 30ş axis lines can be similarly determined, creating a Templar
Cross.
4/CONSTRUCTION SEQUENCE 3
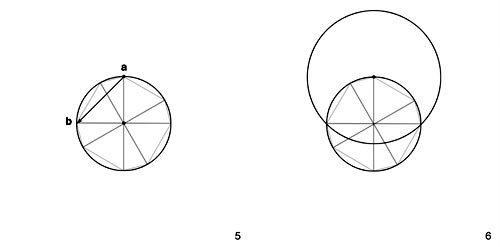
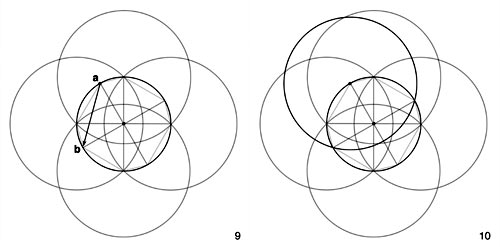
5/ The anchorman 'a' stands at one of the four primary axis points and
planker 'b' stands at an adjacent one.
6/ Planker 'b' will walk this arc, except that not all the arc must be
flattened, so the planker must have some way of knowing where to stop.
5/CONSTRUCTION SEQUENCE 4
7/ There are probably several ways of getting around this problem, but one
simple solution is to bisect your earlier determined 30ş in two and have
someone stand at this point on the circumference. When the planker, the angle
divider and the centre of formation stander all come into alignment it's time
to stop, although you can afford to continue for another 15ft as this will then
get you to the centre needed to construct the small satellite circle.
8/ All four arcs are shown rendered in their entirety, so you get a better
sense of the underlying geometry.
6/CONSTRUCTION SEQUENCE 5
9/ This is a repeat of step 5, except in this instance the anchor man 'a'
stands at one of the earlier 30ş axis points and planker 'b' stands at the
nearest adjacent 30ş point.
10/ This shows the complete arc, but once again not all of it will be
flattened. Knowing where to stop this arc is not a problem as you will
automatically cross the earlier arc at the point at which you must stop.
7/CONSTRUCTION SEQUENCE 6
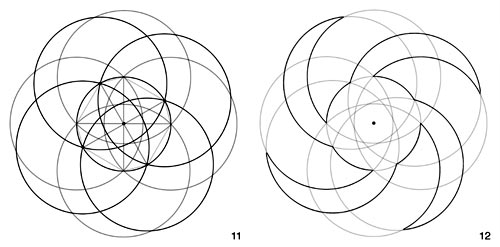
11/ This shows all the arcs constructed in there entirety, again so you can get
a sense of how the complete geometry fits together.
12/ The relevant portions of the entire geometry are highlighted, but in
reality the light grey lines were never walked, only those portions highlighted
by the dark black lines.
8/CONSTRUCTION SEQUENCE 7
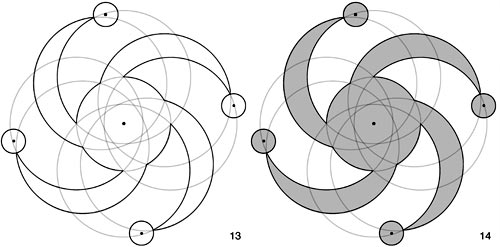
13/ The four satellite circles are constructed with their centres just below
the original inner crescent arm arcs.
14/ The construction lines are now complete and the crescent arms and satellite
circles flattened down.
9/CONSTRUCTION SEQUENCE 8
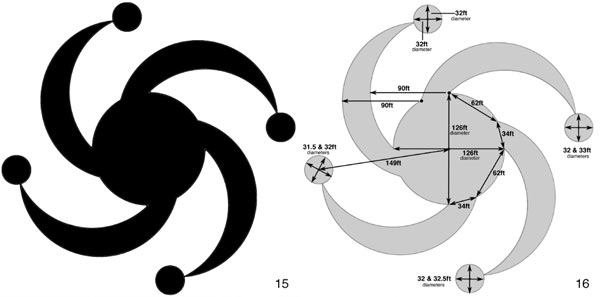
15/ The complete design.
16/ The actual survey diagram on which this construction sequence was derived.
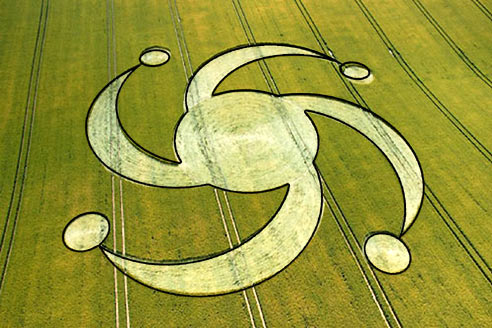
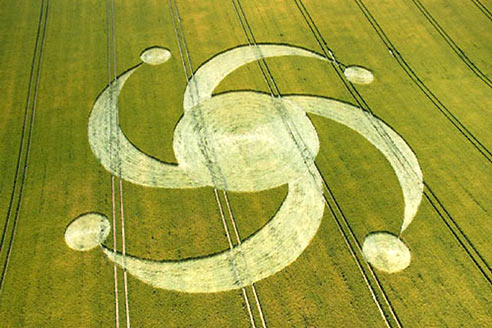
10/PHOTO OVERLAID
This shows the idealised silhouette laid over an aerial photo and you will see
the match is pretty good! This sequence is probably just one of several ways in
which this formation could have been constructed and is not in any way
definitive. At the end of the day we weren't there to see how the formation
actually got there, but based on the levels of damage witnessed inside, I feel
fairly confident that it was manually constructed and as a result it would have
had to unfold pretty much in the way indicated above. Again this was a very
well though out design in terms of its simplicity with regards to laying it out
quickly without recourse to cumbersome surveying equipment or indeed detailed
night time measuring.
Credit to Steve Alexander and
all the other photographers for providing such good overhead images, without
which much of this work would simply just not be possible.
|